Have you ever wished you could create your very own cuddly stuffed toy cat? Imagine holding a soft, adorable cat made by your own hands—perfect for gifts, home decor, or just a new friend to brighten your day.
Making stuffed toy cats is easier than you think, and you don’t need fancy skills or expensive materials. In this guide, you’ll discover simple steps and clever tips that make the process fun and rewarding. Ready to bring your stuffed toy cat to life?
Keep reading, and let’s get started!
Materials Needed
Gathering the right materials is key to making stuffed toy cats. Choosing good supplies helps create a soft and cute toy. It also makes sewing easier and more fun. This section covers fabric, stuffing, and tools needed for this project.
Fabric Choices
- Cotton: Soft, easy to sew, and comes in many colors.
- Fleece: Warm and plush, perfect for cuddly toys.
- Felt: Thick and sturdy, good for small details.
- Minky fabric: Very soft, great for a smooth finish.
- Choose colors and patterns that suit your cat design.
Stuffing Options
- Polyester fiberfill: Lightweight and fluffy, easy to shape.
- Cotton batting: Natural and soft, good for firm stuffing.
- Wool roving: Warm and eco-friendly, adds weight and texture.
- Fabric scraps: Use old cloth pieces for budget-friendly stuffing.
- Pick stuffing that feels soft and holds shape well.
Sewing Tools
- Sewing needles: Choose sharp ones for hand sewing.
- Thread: Match color to fabric for neat stitches.
- Scissors: Use sharp fabric scissors for clean cuts.
- Pins: Hold fabric pieces together before sewing.
- Marking tools: Chalk or fabric pens to trace patterns.
- Optional: Sewing machine to speed up sewing process.
Basic Cat Design
Creating a basic stuffed toy cat starts with a simple design. This design should have clear shapes and easy sewing lines. The goal is to make a cat that looks cute and feels soft. Keeping the design simple helps beginners follow the steps with ease. It also makes the sewing process faster and more enjoyable.
Choose a pattern that shows the cat’s body, head, ears, and tail. These parts should be easy to cut and sew together. Avoid complicated shapes or tiny details at this stage. The simple design will give a charming and lovable stuffed toy cat.
Choosing A Pattern
Select a pattern that fits your sewing skill level. Patterns with big shapes and few pieces work best. Look for patterns with clear instructions and images. You can find free patterns online or buy them in craft stores. Check that the pattern includes all cat parts, like ears and tail. Make sure the size matches the finished toy you want.
Cutting The Fabric
Use soft fabric like cotton or fleece for your stuffed cat. Iron the fabric first to remove wrinkles. Pin the pattern pieces on the fabric to hold them in place. Cut carefully around the pattern edges with sharp scissors. Cut two pieces for each body part to sew together. Keep the edges smooth for easy sewing. Save small scraps for details like eyes or nose later.
Sewing Steps
Sewing a stuffed toy cat involves careful stitching and precise handling. These steps shape the toy and hold its parts together. The sewing process needs patience and attention to detail. Follow these steps to sew the pieces correctly and leave an opening for stuffing.
Stitching The Pieces
Place the fabric pieces right sides together. Use pins to hold them in place. Sew along the edges with a straight stitch. Keep the stitches close and even for strength. Avoid sewing over pins; remove them as you go. Sew all parts except where stuffing will go.
Leaving An Opening
Stop stitching at one side to leave an opening. This gap will allow you to turn the fabric inside out. The opening also lets you add stuffing inside the toy. Make sure the opening is big enough to fit your hand. After stuffing, sew the opening closed with small, neat stitches.

Credit: slyspoon.com
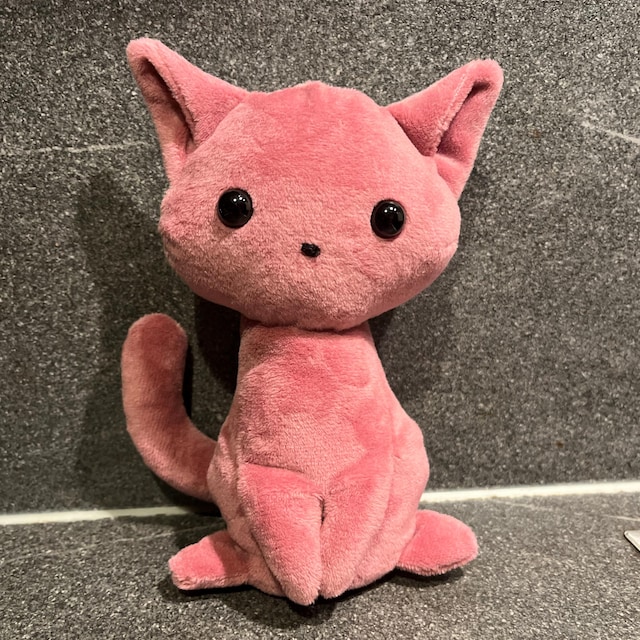
Stuffing The Toy
Stuffing your toy cat is where it truly begins to take shape and come to life. The right stuffing makes your cat cuddly and durable. It also helps you control the toy’s posture and expression, making it as playful or as serene as you want.
Filling Techniques
Start by choosing soft, hypoallergenic stuffing like polyester fiberfill for a fluffy feel. You can also mix in small amounts of cotton or wool to add different textures.
Use small amounts at a time and push the stuffing into corners with a chopstick or pencil. This prevents lumps and helps fill tight spots like the paws or tail evenly.
Don’t overstuff. A well-stuffed toy should be firm but still squeezable. If it’s too tight, seams might burst; too loose, and the toy will flop.
Shaping The Cat
As you add stuffing, pinch and mold the fabric to create the cat’s curves. Focus on the head and body separately to give a natural shape.
For a rounded head, add more stuffing near the ears and cheeks. For paws, stuff lightly so they stay soft but keep their form.
Stop and check often by pressing the toy with your hands. Does it look balanced? If one side is fuller, adjust by adding or removing stuffing.
Have you noticed how adjusting stuffing changes the personality of your toy? Try making one cat plump and one slim to see how their shapes affect their charm.
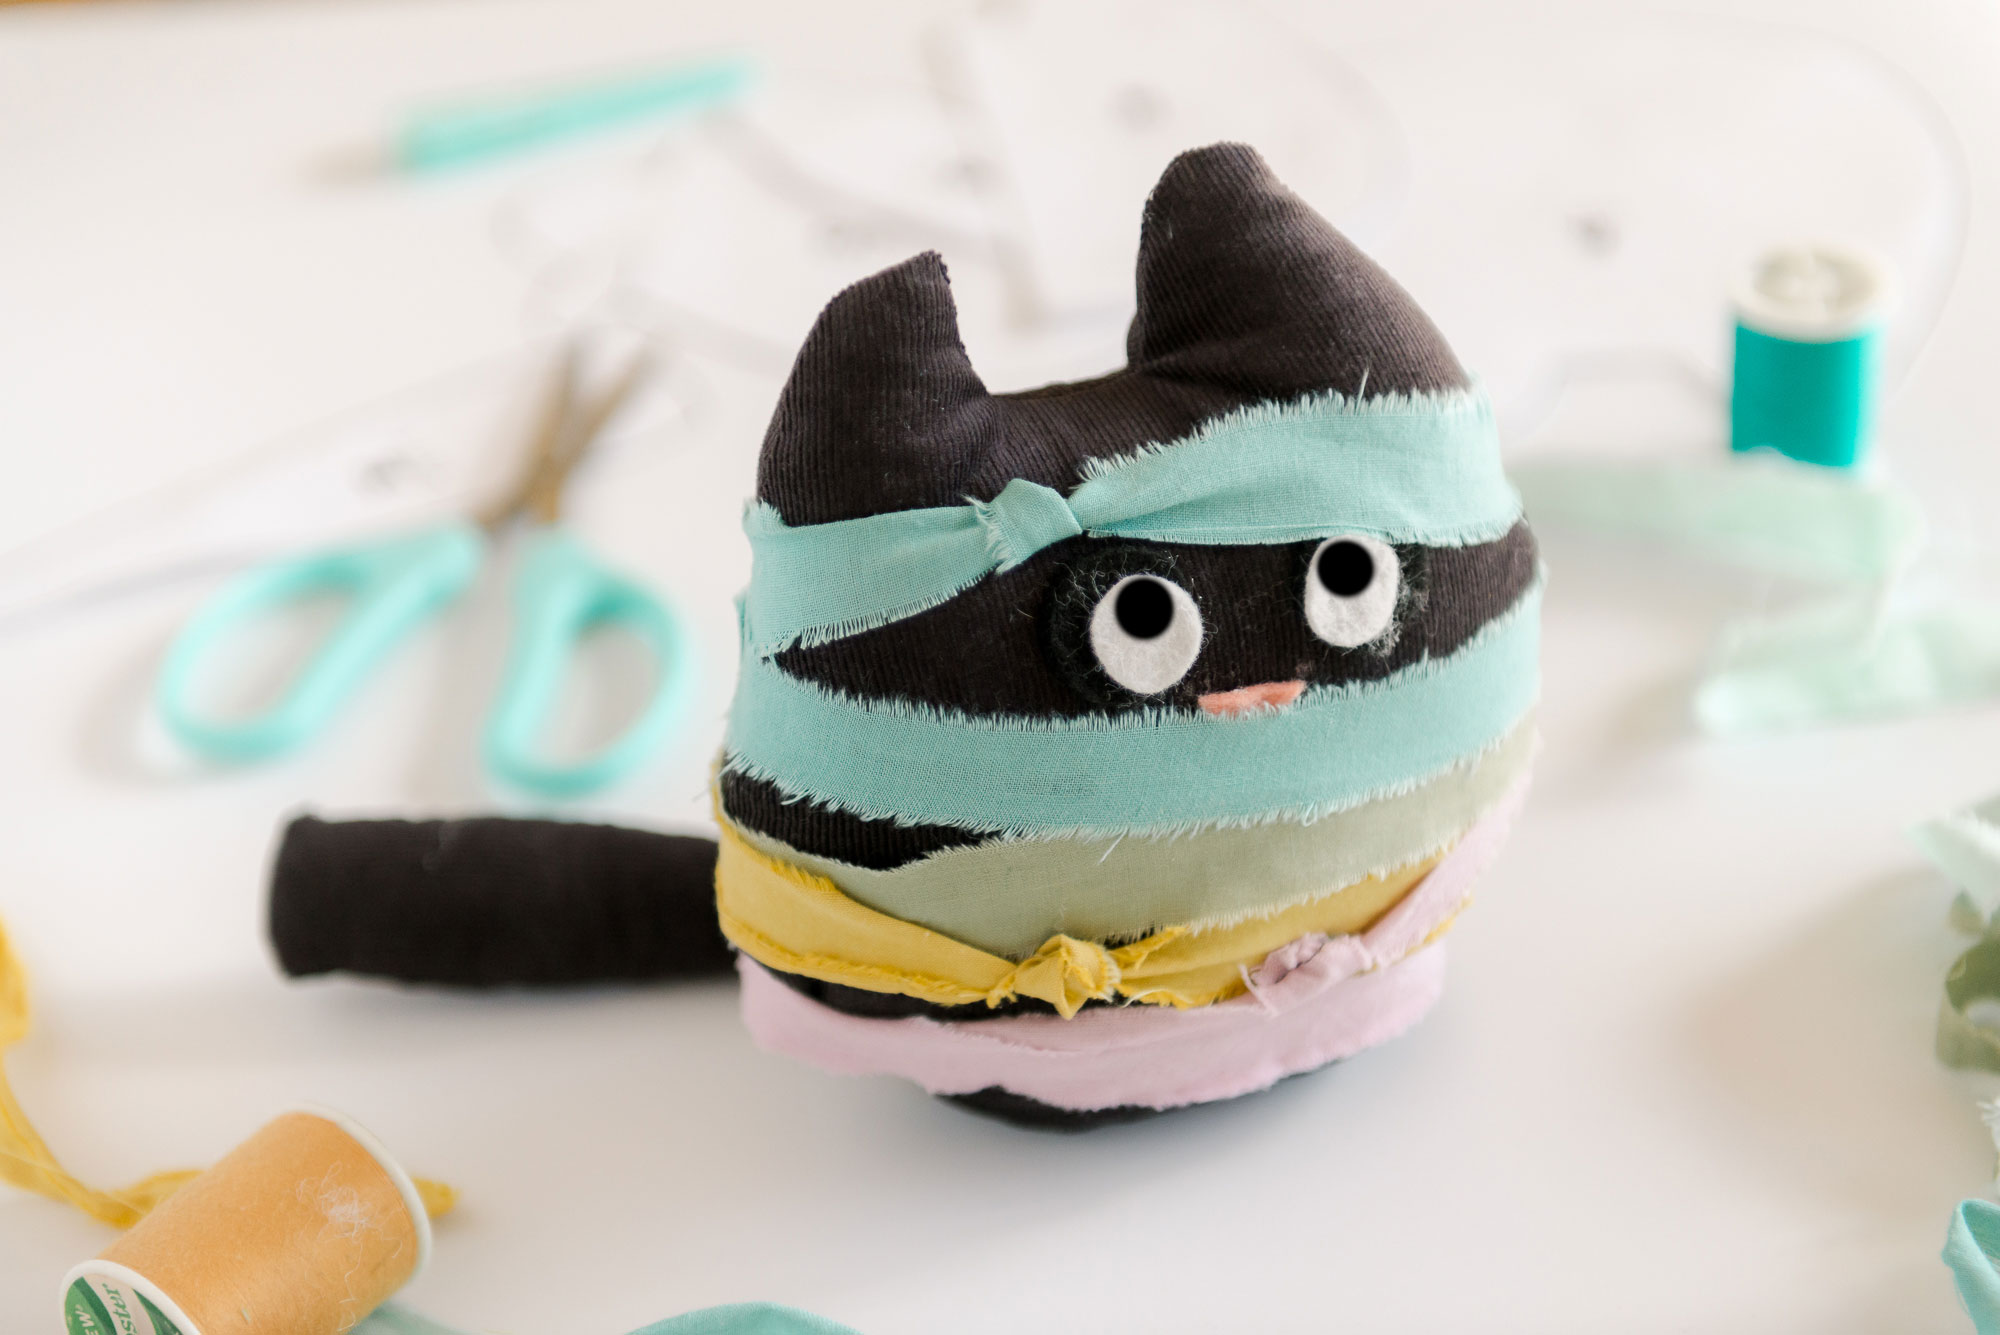
Finishing Touches
Sew the final seams carefully to ensure a smooth finish on your stuffed toy cats. Add facial features with embroidery or fabric markers for personality. Choose soft fabric for a cuddly touch.
Finishing touches transform your stuffed toy cat into a delightful creation. This is where your creativity shines. Each detail adds character and charm. Let’s explore these final steps to bring your plush feline to life.Closing The Opening
Begin by securing the opening used for stuffing. Thread a needle with matching thread. Use a ladder stitch for a seamless finish. This stitch hides the thread as you sew. Pull gently to close the gap. Knot the thread firmly and snip the excess. Now, your stuffed cat is ready for more details.Adding Features
Features bring personality to your toy cat. Start with the eyes. You can sew buttons or use fabric paint. Position them symmetrically on the face. Next, stitch a nose using a small piece of felt. Secure it with a few stitches. For a whimsical touch, add whiskers. Use embroidery thread for a realistic look. Finally, sew a small mouth beneath the nose. These details make your stuffed toy cat unique and lovable.
Credit: www.youtube.com
Customization Ideas
Customization brings your stuffed toy cat to life and makes it truly one-of-a-kind. It’s your chance to add personality and charm that reflect your style or the style of the person you’re making it for. Think beyond just sewing shapes; focus on details that will make your creation unforgettable.
Color Variations
Choosing the right colors can completely change the mood and character of your stuffed toy cat. You can stick with classic cat colors like gray, black, orange, or white, or go wild with bright, playful shades like turquoise or hot pink.
Try mixing fabrics with different textures and colors to add depth. For example, use soft fleece for the body and shiny satin for the ears or paws. Have you thought about how a patchwork of pastel colors might give your toy a whimsical, patchy kitten look?
Consider using patterned fabrics too—polka dots, stripes, or even tiny florals can make your cat stand out. Don’t be afraid to experiment; the key is to pick colors that speak to you and bring joy when you look at them.
Accessories And Embellishments
Adding accessories can give your stuffed cat a unique personality and charm. Think about tiny bows, collars, or even a miniature scarf made from leftover fabric scraps.
You can sew on buttons for eyes or use embroidered thread for a softer, more handcrafted look. Adding a tiny bell or a felt heart patch creates a sweet touch that makes your toy special.
Have you considered using small beads or sequins to add a bit of sparkle? Just be sure they’re securely attached, especially if the toy is for a child. Accessories don’t have to be complicated—sometimes a simple ribbon around the neck can turn an ordinary cat into a cherished gift.
Care Tips
Taking good care of your stuffed toy cats keeps them soft and fresh for a long time. Proper care helps maintain their shape and color. Simple habits can prevent dirt and damage. Follow these easy tips for cleaning and storing your stuffed toy cats.
Cleaning Methods
Use gentle cleaning to avoid harming the fabric or stuffing. Spot cleaning works well for small stains. Dab the dirty area with a damp cloth and mild soap. Avoid soaking the toy completely.
For deeper cleaning, hand wash with cold water and gentle detergent. Rinse thoroughly to remove soap. Let air dry fully, away from direct sunlight. Do not use a dryer or bleach.
If machine washing is necessary, place the toy in a pillowcase. Use a gentle cycle with cold water. Always check the label for washing instructions.
Storage Suggestions
Store stuffed toy cats in a clean, dry place. Avoid damp areas to prevent mold and mildew. Keep them away from direct sunlight to stop color fading.
Use breathable fabric bags or boxes for storage. Avoid plastic bags as they trap moisture. Place silica gel packets nearby to absorb humidity.
Keep toys out of reach of pets and small children. This prevents damage and keeps toys clean. Regularly check stored toys for dust or pests.
Credit: ohyaystudio.com
Frequently Asked Questions
What Materials Are Needed To Make Stuffed Toy Cats?
To make stuffed toy cats, you need fabric, stuffing, thread, and sewing tools. Optional items include buttons and fabric markers for details. Choose soft, durable fabric for a cuddly toy. These materials ensure a safe, cute, and long-lasting stuffed cat.
How Do I Sew A Stuffed Toy Cat Step-by-step?
Start by cutting fabric pieces using a pattern. Sew the pieces inside out, leaving an opening. Turn it right side out and stuff with filling. Finally, sew the opening closed neatly. This method creates a soft, well-shaped stuffed toy cat.
What Stuffing Is Best For Homemade Stuffed Cats?
Polyester fiberfill is the best stuffing for stuffed cats. It’s lightweight, hypoallergenic, and easy to shape. Avoid heavy or coarse stuffing to keep the toy soft. Proper stuffing helps the toy maintain its form and feel cuddly.
Can Beginners Easily Make Stuffed Toy Cats?
Yes, beginners can make stuffed toy cats with basic sewing skills. Start with simple patterns and follow step-by-step instructions. Practice sewing straight seams and stuffing techniques. Patience and practice lead to charming homemade stuffed cats.
Conclusion
Making stuffed toy cats can bring joy and creativity. You choose fabrics, colors, and shapes to create unique toys. This craft helps improve sewing skills and patience. Kids and adults both enjoy making and playing with them. Try different designs to find what you like best.
Handmade toys carry a special charm and warmth. Start small, practice often, and watch your skills grow. Enjoy every step of the process and have fun!


Leave a Reply