Do you love soft toys and wish you could create your very own cute cat? Making a soft toy cat is easier than you might think, and it brings a special joy that you can’t get from store-bought toys.
Imagine holding a cuddly cat made by your own hands—unique, personal, and full of heart. In this guide, you’ll discover simple steps to craft a soft toy cat that feels just right. Ready to bring your creativity to life and make something truly special?
Let’s get started!

Credit: www.youtube.com
Materials Needed
Gathering the right materials sets the foundation for your soft toy cat project. The choices you make here affect the toy’s look, feel, and durability. Let’s break down what you’ll need to bring your cuddly cat to life.
Fabric Choices
Pick a fabric that feels soft and is easy to sew. Fleece and felt are great starters because they don’t fray much and come in many colors. Cotton fabric offers a smooth finish and is perfect if you want a patterned design.
Think about the texture you want your toy to have. Do you want it fluffy or smooth? Velvet and minky fabric can add a luxurious touch but may require a bit more patience while sewing.
Stuffing Options
The stuffing defines how cuddly and huggable your cat will be. Polyester fiberfill is the most common choice because it’s light, affordable, and washable. You can find it easily at craft stores or online.
For a more eco-friendly option, consider using cotton or wool stuffing. If you want your toy to have some weight and stability, small plastic pellets or beans can be added to the stuffing.
Sewing Tools
Having the right tools can make your sewing experience smoother and more enjoyable. You’ll need sharp fabric scissors to cut precise shapes. Pins or clips will help hold pieces together while you sew.
A good sewing needle and thread matching your fabric color are essential. If you use a sewing machine, make sure it’s set up for the type of fabric you chose. Don’t forget a fabric marker or chalk to trace your pattern before cutting.
Preparing The Pattern
Preparing the pattern is a crucial step when making a soft toy cat. It sets the foundation for your entire project, ensuring that the pieces fit together perfectly. Taking your time here saves you from frustration later and results in a charming, well-shaped toy.
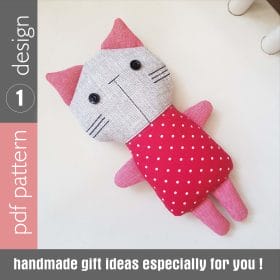
Selecting A Design
Choosing the right design can shape your entire crafting experience. Do you want a realistic cat or a cute, cartoon-like version? Think about the personality you want your toy to have.
Look for patterns online or in craft books that match your vision. If you’re new, start with a simple design featuring basic shapes. Complex details can wait until you feel more confident.
Tracing And Cutting
Once you have your design, the next step is tracing it onto fabric or paper. Use a sharp pencil or fabric chalk for clear lines. Precision here is key because even small mistakes become noticeable in the final product.
Cut carefully along your traced lines. It helps to use fabric scissors if you’re working with cloth—they keep edges smooth. Remember, patience during this step means your soft toy cat will look neater and fit together more easily.
Sewing The Pieces
Sewing the pieces is the heart of making your soft toy cat. This step brings the fabric parts together, shaping the toy. Careful stitching makes your cat sturdy and cuddly. Focus on neat, even stitches for the best result. Take your time to align edges and corners properly. This part sets the foundation for the toy’s look and feel.
Joining The Fabric
Start by placing two fabric pieces with right sides facing each other. Pin the edges to keep them in place. Use a sewing machine or sew by hand with small stitches. Leave a small gap unstitched for turning the fabric inside out. Sew slowly around curves to keep the shape smooth. After sewing, trim excess fabric near corners carefully. Turn the fabric right side out through the gap. Push out corners gently using a blunt tool for sharp points.
Adding Details
Details give your soft toy cat character and charm. Use embroidery thread or fabric paint to create eyes, nose, and mouth. Sew small felt pieces for whiskers and ears to add texture. Attach buttons or beads carefully for eyes, ensuring safety. Stuff the toy with soft filling through the gap left earlier. Distribute filling evenly to avoid lumps. Close the gap with neat hand stitches, hiding the seam well. Small details make your toy cat unique and lovable.
Stuffing The Toy
Stuffing the soft toy cat is a key step to give it life and shape. The right stuffing makes the toy cuddly and durable. It also helps the cat hold its form well. Using proper techniques ensures an even fill without lumps or gaps.
Filling Techniques
Choose soft polyester fiberfill for smooth stuffing. Pull small amounts and fluff them before inserting. Pack the stuffing firmly but not too tight. This keeps the toy soft and squeezable.
Use a chopstick or pencil to push stuffing into small areas. Fill the legs and tail carefully to avoid empty spots. Add stuffing gradually and check the shape as you go.
Shaping Tips
Shape the toy by molding the stuffing with your fingers. Focus on the head and paws for a natural look. Press gently to create rounded edges and curves.
Even out the stuffing by smoothing lumps and bumps. Adjust the fill to balance softness and firmness. Leave the toy slightly less stuffed if you want it more flexible.
Finishing Touches
Add tiny details like embroidered whiskers and a cute nose to your soft toy cat. Attach felt ears and a tail for a playful touch. Sew on button eyes to give your cat character and charm.
Creating a soft toy cat is a rewarding experience, especially as you add those final touches. This is where your toy comes to life, transforming from fabric pieces to a cuddly companion. The finishing touches are your chance to add personality and charm, making your soft toy cat unique.Attaching Features
Attaching the features is like breathing life into your soft toy cat. Begin with the eyes; you can choose buttons for a classic look or embroider them for a softer appeal. Carefully position them to give your cat the desired expression. Next, move on to the nose and mouth. A small triangle of felt or a few stitches can create a cute nose. For the mouth, a simple embroidered line can work wonders. Don’t forget the whiskers, which you can craft using embroidery thread or thin yarn. Finally, add the ears. Ensure they are symmetrical and securely attached, as they contribute significantly to the cat’s character.Final Stitching
Final stitching is all about ensuring durability while maintaining aesthetics. Close any remaining openings with small, even stitches. This not only secures the stuffing but also gives the toy a neat finish. Inspect all seams to ensure there are no loose threads or gaps. Reinforce any areas that might endure extra stress, such as joints or the base of the tail. Step back and admire your creation. Does it reflect the personality you envisioned? A few adjustments here and there might be all that’s needed to make it perfect. Remember, each stitch adds to the love and care embedded in your soft toy cat. What details did you decide on to make your soft toy unique? Share your experiences and inspire others to craft their perfect cuddly companion.Customization Ideas
Customization brings life to your soft toy cat. It lets you create a unique friend that fits your style. Small changes make a big difference. You can play with colors and add fun accessories. These ideas help your soft toy stand out and feel special.
Color Variations
Choose colors that reflect your personality or mood. Mix and match fabric shades to create a lively look. Consider soft pastels for a gentle feel or bright colors for energy.
- Use two-tone fabrics for the body and face.
- Add patches of different colors on the ears or paws.
- Try patterns like stripes or spots for extra charm.
Color choices can also match your favorite cat breeds. Think about calico, tabby, or solid colors. This adds realism or whimsy to your toy.
Accessories
Accessories give your soft toy cat personality. They add a touch of fun and style. Use small items made from fabric, buttons, or ribbons.
- Make a tiny scarf or bowtie to wrap around the neck.
- Sew on little felt whiskers or a nose for detail.
- Add a bell or small charm to the collar area.
- Include tiny hats or glasses for a playful look.
Accessories make your soft toy feel alive. They invite smiles and spark imagination.
Care And Maintenance
Taking care of your soft toy cat helps keep it clean and fresh. Proper care also extends its life. Simple steps protect the fabric and colors. Regular attention prevents damage and dirt build-up. This way, your soft toy cat stays soft and lovely for years.
Cleaning Tips
- Use a gentle brush to remove dust and dirt.
- Spot clean stains with a damp cloth and mild soap.
- Hand wash in cold water to avoid shrinking.
- Do not use bleach or strong chemicals.
- Air dry completely before storing or playing.
- Machine wash only if the toy’s label allows it.
Storage Advice
- Keep your soft toy cat in a cool, dry place.
- Avoid direct sunlight to prevent colors from fading.
- Store in a breathable bag or box to stop dust buildup.
- Do not compress or squish the toy to keep its shape.
- Check regularly for signs of wear or pests.
Credit: www.etsy.com

Credit: slyspoon.com
Frequently Asked Questions
What Materials Are Needed To Make A Soft Toy Cat?
To make a soft toy cat, you need fabric, stuffing, thread, needles, scissors, and optional embellishments like buttons or felt.
How Do I Sew The Parts Of A Soft Toy Cat?
Cut fabric pieces, sew them inside out, leave a gap for stuffing, then close the opening with a neat stitch.
What Stuffing Works Best For Soft Toy Cats?
Polyester fiberfill is ideal for stuffing soft toy cats. It’s soft, lightweight, and hypoallergenic.
How Can I Add Details To My Soft Toy Cat?
Use embroidery for facial features and felt or buttons for eyes and nose. This adds character and charm.
Conclusion
Making a soft toy cat can be fun and rewarding. You only need simple materials and a little patience. Follow the steps carefully, and you will create a cute toy. Each stitch adds personality and charm to your cat. This craft helps improve your skills and creativity too.
Enjoy the process and share your soft toy with friends or family. Handmade toys carry special meaning and joy. Keep practicing, and your toys will get even better. Start your soft toy cat project today and see the results yourself.


Leave a Reply