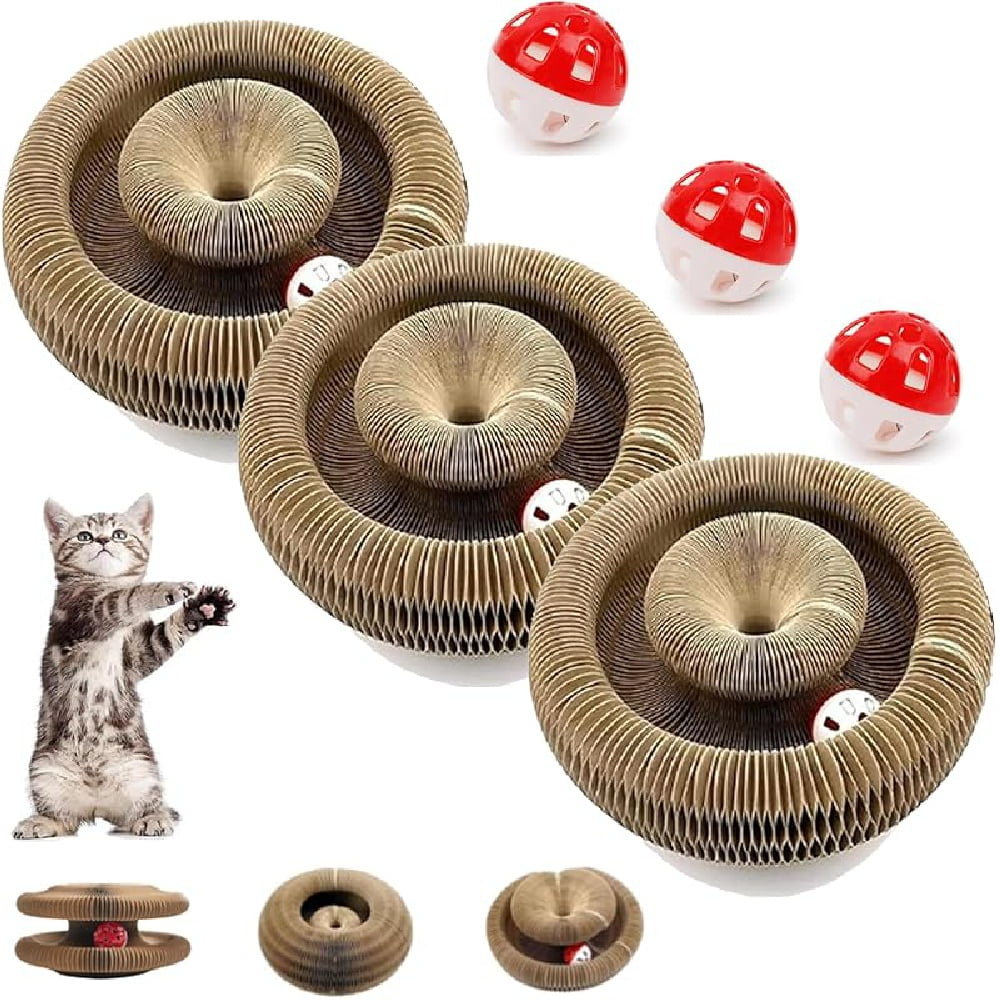
Looking for a fun and simple way to keep your cat entertained? You don’t need expensive toys or fancy gadgets.
With just some cardboard and a little creativity, you can make a ball cat toy that your furry friend will love. This easy DIY project not only saves you money but also gives your cat a new favorite plaything. Keep reading, and you’ll discover step-by-step how to create this engaging toy that will keep your cat happy and active for hours.
Ready to get started? Your cat’s next favorite toy is just a few steps away!
Materials Needed
Gathering the right materials is the first step to create a fun cardboard ball cat toy. Simple items can make a safe and entertaining toy for your cat. Choose strong and non-toxic supplies to ensure durability and safety. Preparing everything before starting helps the crafting process go smoothly. This section covers the essential materials needed for this DIY project.
Choosing The Right Cardboard
Select cardboard that is clean and sturdy. Avoid boxes with heavy printing or glossy surfaces. Corrugated cardboard works best because it is tough and has layers. Thick cardboard lasts longer when your cat plays with the toy. Look for pieces that are free from dirt, moisture, or damage. Recycle old boxes from home for an eco-friendly choice. Cut cardboard into manageable sizes for easy shaping and handling.
Additional Supplies
- Non-toxic glue or tape to hold parts together
- Scissors or a craft knife for cutting cardboard
- Ruler and pencil for measuring and marking
- Small bells or beads to place inside the ball
- String or yarn for added play features
- Optional: washable paint or markers for decoration
Choose supplies safe for pets to avoid any harm. Keep tools out of your cat’s reach during crafting. These materials will help you make a fun, interactive toy that your cat will enjoy.

Credit: www.amazon.com
Preparing The Cardboard
Preparing the cardboard is the first key step in making a fun ball toy for your cat. Good preparation helps the toy last longer and be safe for your pet. Gather clean, sturdy cardboard without any prints or coatings. This type of cardboard works best for crafting and is easy to cut and shape.
Work on a flat surface with enough space. Keep scissors or a craft knife sharp and ready. Have a ruler and pencil for marking straight lines. Take your time to prepare the cardboard carefully. This sets the base for a strong, playful cat toy.
Cutting Strips
Start by cutting the cardboard into long, thin strips. Each strip should be about 1 inch wide. Use a ruler to mark even lines before cutting. Straight, even strips fit together better when shaping the ball. Cut slowly to avoid tearing the cardboard.
Keep the strips uniform in size. This makes the ball look neat. If the strips are uneven, the toy might fall apart quickly. Collect all the strips in a pile to stay organized. This step is simple but very important for the final shape.
Shaping The Pieces
Bend the strips gently to form curved pieces. The cardboard will flex without breaking if handled with care. Create small loops and arches from the strips. These shapes will connect to build the ball structure.
Test the curves by fitting the pieces together loosely. Adjust the bends until the parts fit well. The goal is to form a round shape that holds together. Avoid sharp bends that can crack the cardboard.
Prepare enough curved pieces to assemble a complete ball. This shaping process prepares the cardboard for easy assembly. Each piece should be smooth and flexible for building the toy.
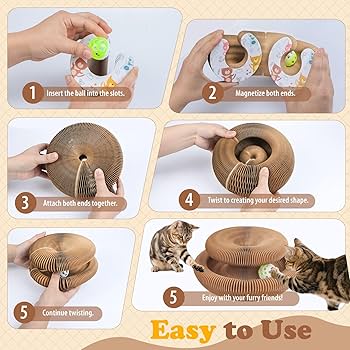
Assembling The Ball
Assembling the cardboard ball is where your project starts to take shape. This step requires patience and precision to ensure the toy is sturdy and fun for your cat. Let’s break down the essential folding and connecting techniques that will help you build a perfect ball.
Folding Techniques
Start by folding each cardboard strip carefully. Use crisp, sharp folds to create clean edges. This not only makes the ball look neat but also helps the strips hold their shape better.
Try folding the strips into a slight curve rather than a straight line. This curve adds a natural roundness to the ball without forcing the cardboard to bend awkwardly. If the cardboard is too stiff, scoring lightly along the fold line can make bending easier.
Have you noticed how small adjustments in folding can change the whole structure? Take your time here—your patience will pay off in a smoother, more durable toy.
Connecting The Strips
Once the strips are folded, it’s time to connect them. Use glue or tape to join the ends securely. Start by creating small rings with the strips, then link these rings together to form the ball shape.
Overlap the ends slightly before securing them. This overlap strengthens the connection and prevents the ball from falling apart when your cat plays. You might find that using hot glue works best for a quick, strong hold.
Think about how your cat will interact with the toy. Will the connections hold up to paws and teeth? Testing the strength of each joint as you go can save frustration later.

Credit: m.youtube.com
Adding Finishing Touches
Adding finishing touches to your cardboard ball cat toy not only makes it more durable but also more appealing to your furry friend. These final steps help ensure the toy stays intact during playtime and catches your cat’s attention with small but effective details. Taking a little extra time here can make a big difference in how much your cat enjoys the toy.
Securing Loose Ends
Loose edges or flaps can quickly unravel and reduce the toy’s lifespan. Use non-toxic glue or tape to firmly secure any parts that stick out or feel flimsy. If you notice any layers peeling apart, press them back together and hold until dry to prevent your cat from pulling them apart during play.
Check the ball for any sharp edges or points where the cardboard might catch your cat’s claws or teeth. Sanding these areas lightly or covering them with extra layers of cardboard can make the toy safer and more comfortable. You don’t want your cat to get hurt or lose interest because the toy is rough or uncomfortable.
Optional Decorations
Adding simple decorations can make the toy more engaging. Try attaching small pieces of yarn or feathers with a dab of glue to one side of the ball. Cats love textures and movement, so these additions can turn a plain ball into a fascinating plaything.
Think about using non-toxic markers or paints to add patterns or bright colors. Some cats respond well to visual stimuli, so a splash of color might grab their attention quicker. Just make sure any materials you use are safe and won’t peel off easily.
Have you ever noticed how your cat reacts to different textures? Adding a variety of tactile elements can keep the toy interesting longer. Experiment with what your cat prefers—you might discover a favorite that keeps them entertained for hours.
Safety Tips
Ensure your workspace is clear of sharp tools to prevent injuries. Use non-toxic glue to keep it safe for pets. Supervise your cat during playtime to avoid any choking hazards.
Creating a fun cardboard ball toy for your cat can be a delightful DIY project. However, ensuring the toy is safe is crucial for your furry friend’s well-being. Let’s dive into some essential safety tips to keep in mind during this creative endeavor.Avoiding Sharp Edges
When crafting a cardboard ball, smoothness is key. Ensure all cut edges are sanded or covered to avoid any sharpness. A simple way to do this is by using fine-grit sandpaper to gently smooth the edges. You might recall a time when you picked up a cardboard box and felt a sharp edge. Imagine if your curious cat encounters that edge. A little extra effort in smoothing can prevent scratches or injuries.Non-toxic Materials
Cats love to nibble and chew, so it’s vital to use non-toxic materials. Opt for non-toxic glue or adhesive when assembling the ball. Look for labels that specifically state they are pet-safe. Think about the last craft project you undertook. You probably checked the materials for safety. Apply the same diligence here to ensure your cat’s health isn’t compromised. Using safe markers or paints for decoration is another aspect to consider. Cats are naturally curious and might lick or chew on the toy. Safe materials ensure playtime remains worry-free. By keeping these tips in mind, you can create a toy that is not only fun but also safe for your cat. Do you have any other safety tips you swear by when crafting for your pet? Share them in the comments!Engaging Your Cat
Getting your cat excited about a new toy can sometimes be a challenge. Cats are curious but also cautious creatures. Engaging them with a simple cardboard ball toy requires patience and a bit of creativity from you.
Introducing The Toy
Start by placing the cardboard ball in your cat’s favorite hangout spots. Let your cat approach it at their own pace without forcing interaction. Sometimes, just having the toy nearby sparks curiosity.
Try gently rolling the ball across the floor to catch their attention. The movement mimics prey and can trigger their hunting instincts. Watch how your cat reacts; even a slight paw swipe is a good sign.
Encouraging Playtime
Make playtime fun by joining your cat in the game. Use the cardboard ball to initiate a little chase or batting session. Your involvement shows the toy is interesting and safe.
If your cat loses interest quickly, try mixing things up. Hide the ball partially under a blanket or behind furniture. This adds a sense of mystery and encourages your cat to explore.
Ask yourself: What moves or sounds get your cat’s attention the most? Some cats love rolling toys, while others prefer batting or carrying them. Tailor your play style to what excites your cat the most, and you’ll see more engagement.
Cleaning And Maintenance
Keeping your cardboard ball cat toy clean helps it last longer and stay safe. Dirt and cat hair can build up quickly. Regular care keeps your cat healthy and happy. A few simple steps make cleaning easy and effective.
Spot Cleaning
Use a damp cloth to clean small dirty spots. Avoid soaking the cardboard. Gently rub the area to remove dirt or stains. Let it dry completely before giving it back to your cat. Spot cleaning stops germs from spreading.
Replacing Worn Parts
Check the toy often for torn or loose pieces. Remove any parts that could hurt your cat. Replace broken sections with new cardboard. Cut new shapes and tape or glue them securely. This keeps the toy safe and fun for your cat to play with.
Credit: www.fleuristesavard.com
Frequently Asked Questions
What Materials Are Needed For A Cardboard Ball Cat Toy?
You need cardboard, scissors, non-toxic glue, and string. These are safe and easy to find materials. Using recycled cardboard is eco-friendly and cost-effective.
How Do I Assemble A Cardboard Ball Cat Toy?
Cut cardboard into strips, roll them into balls, and glue securely. Attach a string for interactive play. Ensure edges are smooth to avoid hurting your cat.
Is The Cardboard Ball Safe For Cats To Play With?
Yes, if made from non-toxic, sturdy cardboard and glued properly. Always supervise play to prevent swallowing small pieces. Replace the toy if damaged.
How Often Should I Replace The Cardboard Cat Toy?
Replace it when it becomes worn or torn. A damaged toy can be unsafe. Regular replacement keeps your cat interested and active.
Conclusion
Making a cardboard ball cat toy is fun and easy. It uses simple materials you can find at home. Your cat will enjoy playing and chasing it. This toy helps keep your cat active and happy. You save money by making toys yourself.
Give it a try and watch your cat have fun. Simple projects like this bring joy to both you and your pet. Start crafting today and see the difference!


Leave a Reply