If you want to give your cat a fun new toy that keeps them active and entertained, making a cat tunnel toy using boning is a great idea. You don’t need to spend a lot of money or buy fancy materials.
With just a few simple supplies and easy steps, you can create a durable, foldable tunnel that your cat will love. Imagine watching your furry friend dart, hide, and play inside a tunnel you made yourself. Keep reading, and you’ll learn exactly how to make this exciting toy that’s perfect for your cat’s playful nature.
Materials Needed
Gathering the right materials is key to making a sturdy and fun cat tunnel toy. Choosing fabrics and boning that suit your cat’s play style will make all the difference. Let’s break down what you’ll need to get started.
Choosing The Right Fabric
Pick a fabric that’s durable but soft enough for your cat to enjoy crawling through. Canvas, denim, or heavy cotton are great choices because they stand up to scratching and rough play. Avoid slippery or very thin fabrics—they won’t hold the tunnel’s shape well or last long.
Think about cleaning too. If your cat tends to shed a lot, consider fabrics that are easy to wipe or machine wash. Have you noticed your cat prefers a cozy spot? Adding a soft lining like fleece inside can make the tunnel more inviting.
Selecting Boning Types
Boning is the secret to giving your cat tunnel its shape and structure. You want flexible but firm boning that can bend into a tunnel without breaking. Plastic boning is lightweight and safe, making it perfect for this project.
Metal boning is stronger but can be heavier and may have sharp edges, so if you choose metal, ensure it’s well covered. If you want the tunnel to fold flat for easy storage, look for spiral plastic boning—it bends easily and springs back.
Additional Supplies
- Thread:Use strong polyester thread to hold everything together securely.
- Scissors:Sharp fabric scissors make cutting easier and cleaner.
- Measuring Tape:Accurate measurements ensure the tunnel fits your space and your cat’s size.
- Sewing Machine or Needle:A machine speeds things up, but hand sewing works if you’re patient.
- Fabric Chalk or Marker:For marking your fabric without permanent stains.
Have you checked your craft box recently? Sometimes, you already have these supplies at home. It’s satisfying to create something new from items you already own.

Credit: www.amazon.com
Preparing The Fabric
Preparing the fabric is a crucial step in making a cat tunnel toy using boning. It sets the foundation for a sturdy and playful tunnel that your cat will love. Taking your time here ensures the fabric fits well around the boning and holds its shape perfectly.
Measuring And Cutting
Start by deciding the size of your cat tunnel. Typical tunnels are about 20 inches in diameter and 36 inches long, but adjust based on your cat’s size.
Use a measuring tape to mark these dimensions on your fabric. Remember to add at least 1 inch on all sides for seam allowances.
Cut the fabric carefully with sharp scissors or a rotary cutter. Precision here prevents uneven edges and helps the tunnel look professional.
Marking Boning Placement
Boning gives the tunnel its structure, so marking its placement correctly is key. Lay your fabric flat and use a fabric pen or chalk to draw parallel lines where the boning will go.
Space these lines evenly—about every 4 to 6 inches works well. This spacing keeps the tunnel firm but flexible for your cat to move through.
Double-check your marks before inserting the boning. Accurate placement means your tunnel won’t sag or collapse easily, making playtime more fun and safe.
Inserting The Boning
Inserting boning into your cat tunnel toy is a crucial step that gives the structure its shape and durability. Without proper support, the tunnel may collapse or lose its form, making playtime less fun for your feline friend. Let’s look at how to prepare the fabric for boning and then secure it effectively.
Creating Boning Channels
Start by marking the fabric where you want the boning to go. Use a fabric marker or chalk to draw straight lines parallel to the tunnel’s length. These lines will guide your stitching and keep the boning in place.
Next, sew channels along these lines. Make sure the channels are just wide enough for the boning to slide through snugly. If the channels are too loose, the boning might shift and cause uneven support.
Think about the number of channels based on how firm you want the tunnel. More channels mean more boning pieces and stronger structure, but too many might make the tunnel too rigid for your cat’s comfort.
Securing The Boning
Once your channels are ready, carefully insert the boning strips. If you’re using plastic boning, cut it slightly shorter than the channel length to avoid poking through the fabric edges. Metal boning should be handled cautiously to prevent sharp ends.
To keep the boning from slipping out, sew a few small stitches at the ends of each channel. This simple step locks the boning in place and prevents it from moving during play.
Have you noticed how a well-secured boning makes the tunnel bounce back after your cat’s energetic jumps? That’s the difference between a homemade toy that lasts and one that quickly wears out.
Sewing The Tunnel
Sewing the tunnel is the key part of making a cat tunnel toy. It brings all fabric pieces together to form the tunnel shape. Using boning helps keep the tunnel firm and flexible.
Work carefully to sew straight seams and strong joins. This will make the tunnel durable for playful cats. Use a sewing machine for best results and neat edges.
Joining Fabric Pieces
Place the fabric pieces right sides together. Align edges carefully to avoid uneven seams. Pin or clip the pieces to hold them in place.
Sew along the pinned edges with a ½ inch seam allowance. Leave one side open for inserting boning and turning the tunnel inside out. Press the seams flat using an iron. This helps to create a smooth finish.
Finishing Seams
Trim seam allowances to reduce bulk. Use pinking shears or zigzag stitch to prevent fraying. Turn the tunnel inside out through the open side.
Insert boning strips into the seams to give the tunnel its structure. Carefully stitch the open side closed with a slip stitch or topstitch for a clean look. Press the entire tunnel to set the shape.
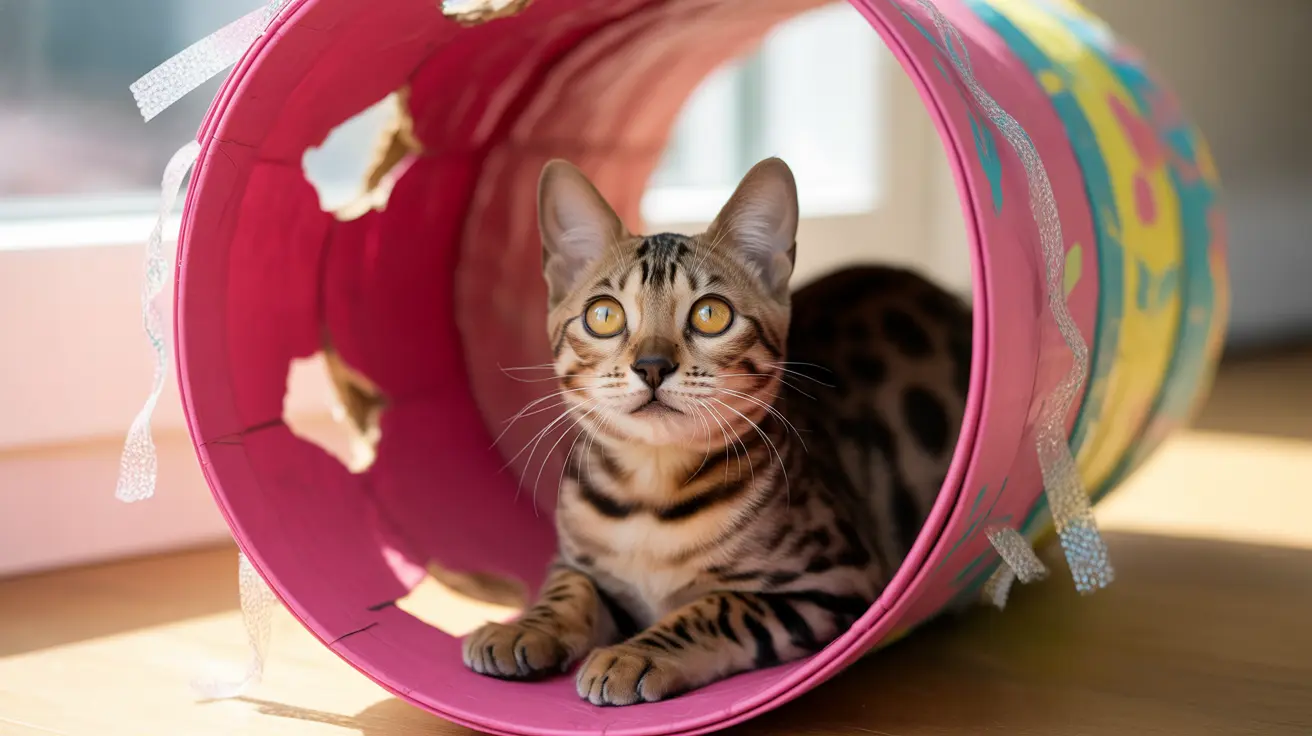
Adding Fun Features
Create a playful cat tunnel using boning for structure. Cats love exploring these tunnels, providing endless entertainment. Use colorful fabric to attract their attention and enhance their playtime.
Adding fun features to your cat tunnel toy can make it more engaging. Cats love interactive toys that stimulate their senses and curiosity. By incorporating playful elements, you can create a more exciting playtime experience for your feline friend. Let’s explore some ways to enhance your cat tunnel toy.Attaching Toys
Hang dangling toys inside the tunnel. Use strings or clips to secure them. Choose toys that make noise, like bells or crinkly materials. These will grab your cat’s attention. You can also add small plush toys. Cats enjoy batting and chasing them. Place these toys at different points in the tunnel. This variety keeps your cat entertained for longer periods.Decorative Elements
Add colorful fabrics to the tunnel’s exterior. Use non-toxic paints or dyes for safety. Bright colors can attract your cat’s interest. You might also sew on fabric patches with fun designs. Consider adding small pockets on the tunnel’s surface. These can hold treats or catnip. Your cat will enjoy searching for these hidden surprises. Decorate the entrance with ribbons or tassels. They make the tunnel inviting and fun to explore.
Credit: www.goodhousekeeping.com
Testing And Adjusting
Testing and adjusting your cat tunnel toy is key to making it safe and fun. This stage helps find weak spots and size issues. You want your cat to explore without any trouble or risk. Spend time checking every part of the tunnel. Watch how your cat interacts with it. Small changes can make a big difference in playtime.
Ensuring Stability
Check if the tunnel stands firm and does not wobble. Press gently on different sides to test its strength. If it leans or falls easily, add extra boning strips inside. Secure the ends with strong stitches or fabric glue. Use non-slip pads under the tunnel to stop sliding on smooth floors. A stable tunnel keeps your cat safe and confident while playing.
Making Size Adjustments
Observe if your cat fits comfortably inside the tunnel. Look for tight spots or areas that are too wide. Adjust the length by folding or adding fabric sections. Widen the tunnel by sewing in extra fabric panels with boning. Make sure the entrance is big enough for easy access. Tailoring the size ensures your cat enjoys the tunnel fully without feeling cramped.
Safety Tips
Creating a cat tunnel toy with boning is a fun project, but safety should always be your top priority. Your cat’s well-being depends on the choices you make about materials and construction. Paying close attention to potential hazards can save you from stressful vet visits and keep your furry friend happy and healthy.
Avoiding Choking Hazards
Small parts or loose pieces can quickly turn your cat’s playtime into a choking risk. Make sure any embellishments, like buttons or beads, are securely sewn or avoided altogether. Instead, opt for stitched patterns or fabric paint to decorate the tunnel safely.
Check the boning ends carefully. If the tips are exposed or sharp, cover them with fabric or protective caps. This prevents your cat from getting poked or swallowing dangerous fragments.
Ask yourself: could my cat easily pull off any part of this tunnel? If the answer is yes, redesign before finishing. Your cat’s safety comes first.
Using Pet-safe Materials
Choosing the right materials can make all the difference in your cat’s comfort and health. Use non-toxic, breathable fabrics that won’t irritate your cat’s skin. Natural cotton or soft fleece are excellent choices for the tunnel’s exterior.
Boning is essential for structure, but ensure it’s coated or made from pet-safe materials. Plastic boning is usually safer than metal, reducing injury risks if your cat bites or scratches it.
Think about cleaning, too. You want materials that are easy to wash and dry quickly to prevent mold and bacteria buildup. Your cat deserves a fresh and safe play space every day.

Credit: www.amazon.com
Frequently Asked Questions
What Materials Are Needed To Make A Cat Tunnel Toy?
To make a cat tunnel toy, you need boning, fabric, scissors, thread, and a sewing machine. Boning helps maintain the tunnel’s shape and durability.
How Does Boning Improve A Cat Tunnel Toy?
Boning provides structure and support, preventing the tunnel from collapsing. It keeps the tunnel open and stable, making it more fun for cats to play in.
Is Making A Cat Tunnel Toy With Boning Difficult?
No, it’s a simple DIY project. Basic sewing skills and patience are enough to create a sturdy, attractive cat tunnel using boning.
Can I Customize The Size Of The Cat Tunnel?
Yes, you can adjust the fabric and boning length. Custom sizes fit your space and your cat’s preferences perfectly.
Conclusion
Making a cat tunnel toy with boning is simple and fun. It gives your cat a cozy place to play and hide. Using boning helps the tunnel keep its shape well. You save money by creating your own toy at home.
Plus, you can customize the size and colors. Your cat will enjoy exploring and resting inside the tunnel. Try this easy project to bring joy to your furry friend. A little effort brings big smiles for both you and your cat.


Leave a Reply