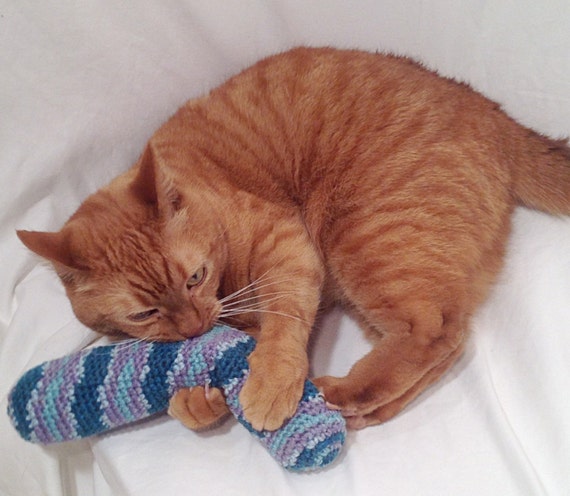
Do you want to make a fun and safe toy your cat will love? A crochet cat kicker toy is perfect for keeping your furry friend entertained and active.
It’s soft, durable, and easy to customize with colors and shapes your cat will adore. In this guide, you’ll learn simple steps to create your own cat kicker toy that feels great for your kitty to kick and cuddle. Keep reading, and you’ll soon have a handmade toy that brings joy to both you and your cat.
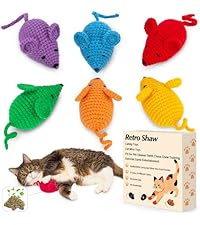
Credit: www.amazon.com
Materials Needed
Creating a crochet cat kicker toy requires a few basic materials. These help make the toy safe and fun for your cat. Choose the right supplies for the best results. Prepare everything before starting your project.
Yarn Selection
Pick soft yarn that feels good to touch. Choose durable yarn that can handle rough play. Cotton or acrylic yarn works well. Avoid yarn that sheds or irritates your cat’s skin. Bright colors can make the toy more attractive.
Hook Size
Use a crochet hook size that matches your yarn weight. A medium-sized hook (4mm to 5mm) is often ideal. It creates a tight stitch to keep stuffing inside. A hook too large makes loose stitches; too small makes hard fabric.
Stuffing Options
Stuff the toy to keep it soft and squeezable. Polyester fiberfill is a popular choice. It is lightweight and holds shape well. You can also use fabric scraps or cotton balls. Avoid any toxic or small materials that could harm your cat.
Additional Supplies
- Scissors for cutting yarn cleanly
- Yarn needle for sewing parts together
- Catnip to add inside for extra fun
- Stitch markers to track your progress
- Measuring tape to keep size accurate
Basic Crochet Stitches
Basic crochet stitches form the foundation of every project. Learning these stitches helps you create fun and useful items, like a cat kicker toy. These stitches are simple and easy to practice. They give your work a neat and sturdy finish.
Understanding these stitches makes crocheting more enjoyable. You can follow patterns and create your own designs. Each stitch has a special look and purpose. Mastering them lets you build shapes and textures for your toy.
Chain Stitch
The chain stitch starts every crochet project. It creates a base row of loops. Hold the yarn and hook, then pull the yarn through the loop on the hook. Repeat this to make a chain of the desired length.
Chains are light and flexible. They connect different parts of your work. For a cat kicker toy, chains help form the body or tail. This stitch is fast and easy to learn.
Single Crochet
Single crochet is a tight, firm stitch. It makes a dense fabric that holds stuffing well. Insert the hook into the stitch, yarn over, and pull through. Yarn over again and pull through both loops on the hook.
This stitch is perfect for creating a durable toy. It stops the stuffing from coming out. Single crochet gives a smooth texture that cats like to bite and kick.
Slip Stitch
Slip stitch is the shortest and tightest stitch. It joins pieces or rounds without adding height. Insert the hook into the stitch, yarn over, and pull through both loops on the hook in one move.
Use slip stitch to close gaps or move your yarn. It helps shape the toy and finish edges neatly. This stitch keeps your work clean and sturdy.
Creating The Toy Body
Creating the toy body is where your cat kicker starts to take shape. This part involves crafting a sturdy yet soft cylinder that your cat can kick and cuddle. Focus on keeping your stitches even and tight to ensure durability and comfort.
Starting The Base
Begin by making a magic ring with your yarn. This creates a tight circle that won’t leave holes in the base. Crochet several single crochets into the ring, usually six to eight, depending on the size you want.
Pull the ring tight to close the center completely. This gives the base a neat, solid start that won’t unravel. Does your cat prefer bigger toys? Consider adding a few more stitches here to enlarge the base.
Shaping The Cylinder
After the base, work in continuous rounds without joining to build the cylinder’s height. Use single crochet stitches for a dense texture that stands up to playful kicking. Keep your tension consistent to avoid bulges or uneven spots.
- Maintain a steady stitch count each round to keep the shape uniform.
- Add colorful stripes if you want to personalize your toy.
- Stop once the cylinder reaches your desired length—usually around 8 to 12 inches.
Think about your cat’s style of play. Do they like long toys to grab with paws or shorter ones to toss around? Adjust the height accordingly to match their energy and size.
Closing The Ends
Once the cylinder is the right length, it’s time to close the open end. Decrease stitches gradually by crocheting two stitches together in each round. This shapes the end smoothly without puckering.
Stuff the cylinder firmly with soft fiberfill before closing completely. This stuffing gives the kicker its bounce and makes it comfy for your cat to grip. Leave a small opening for stuffing and then finish off neatly.
How tightly you stuff affects the toy’s feel. Experiment with different stuffing levels to find what your cat loves most. A well-closed end ensures your cat can’t pull out the stuffing easily, keeping the toy safe and durable.
Adding Texture And Details
Adding texture and details to your crochet cat kicker toy brings it to life. It makes the toy more interesting for your cat and more satisfying for you to create. Small touches like embroidered features or attached decorations can transform a simple shape into a favorite plaything.
Embroidering Features
Use embroidery to add eyes, a nose, or whiskers. Choose yarn in contrasting colors so the features stand out clearly. You can create simple shapes, like circles for eyes, or get creative with patterns to give your toy character.
Try different stitches, such as satin stitch for smooth areas or backstitch for outlines. This variety adds dimension and makes your toy more tactile. Have you experimented with embroidery on crochet before? It’s a chance to practice fine motor skills while personalizing your creation.
Attaching Decorative Elements
Attach small items like bells, ribbons, or felt shapes to add interest. Secure them tightly to avoid any choking hazards for your cat. Using a strong yarn needle and matching thread helps keep everything in place through vigorous play.
- Add a small bell inside to make the toy jingle.
- Sew on felt patches for contrast and softness.
- Use ribbons for added flair and texture.
Consider your cat’s preferences—does it enjoy noise or different textures? Adding these elements can make your crochet kicker more engaging and fun. What unique details will you add to your next cat toy?
Stuffing And Finishing
Fill the cat kicker toy firmly with soft stuffing to keep its shape and provide a satisfying feel for your cat. Sew the opening tightly to ensure the stuffing stays secure during play.
Stuffing and finishing your crochet cat kicker toy might seem like the easy part, but it’s crucial to get it right for the safety and enjoyment of your feline friend. The materials you choose for stuffing can make a world of difference in the durability and appeal of the toy. Plus, the way you finish the toy ensures it withstands the energetic playtime of your cat. Let’s dive into the key steps to ensure your cat kicker toy is not only fun but also safe and long-lasting.Choosing Safe Fillings
When selecting stuffing for your cat kicker toy, prioritize safety. Opt for non-toxic materials that won’t pose a hazard if your cat manages to tear the toy open. Common safe fillings include:- Polyester fiberfill, which is soft and durable
- Old fabric scraps, providing a sustainable option
- Organic cotton, for a natural touch
Sealing The Toy
Once you’ve chosen your stuffing, it’s time to seal the toy securely. The last thing you want is for your cat to access the stuffing during play. Use a sturdy yarn and a tight stitch to close up the opening. A whip stitch or a mattress stitch can be effective for this purpose. Double-check that there are no loose ends that your cat could easily pull apart.Final Touches
With the toy sealed, consider adding a few final touches to make it extra special for your cat. A little bell securely sewn on can add an auditory element that cats love. Ensure any embellishments are securely attached and not small enough to be swallowed. Ask yourself: What would make this toy stand out in a pile of cat toys? Sometimes, a simple bow or a contrasting yarn stripe can make all the difference. Remember, the goal is to create a toy that is as safe as it is fun. By paying attention to these details, you can ensure your crochet cat kicker toy becomes your cat’s new favorite plaything.
Credit: shlearnings.com
Safety Tips For Pet Toys
Creating a crochet cat kicker toy is a fun project, but safety should always be your top priority. Ensuring the materials and construction are safe helps protect your furry friend from harm. Let’s look at key safety tips that keep your cat happy and healthy while playing.
Using Non-toxic Materials
Always choose yarn and stuffing labeled as non-toxic and pet-safe. Avoid materials treated with harsh chemicals or dyes that could irritate your cat’s skin or cause poisoning if chewed. Cotton yarn is a great option because it’s natural and gentle on paws and mouths.
I once used a brightly colored yarn without checking its safety, and my cat developed mild irritation. That experience taught me to always read labels carefully and prioritize natural fibers.
Avoiding Small Parts
Skip buttons, beads, or any small decorations that could come loose and become choking hazards. Cats love to chew and swallow small pieces, which can lead to serious health issues. Instead, focus on simple designs that rely on texture and shape to engage your cat.
Think about how your cat plays—would a small part easily detach? If yes, replace it or sew it tightly enough to withstand rough play.
Regular Inspection
Check your crochet toy regularly for loose threads, holes, or worn stuffing. Repair or retire the toy immediately if you spot damage. A well-maintained toy is safer and lasts longer, providing consistent fun for your cat.
Have you ever found your cat’s favorite toy shredded beyond recognition? That’s a clear sign it’s time to fix or replace it before any dangerous bits come loose.
Customizing Your Kicker Toy
Customizing your crochet cat kicker toy is where you can truly make it special for your furry friend. This step allows you to tailor the toy’s look, scent, and size to match your cat’s preferences and play style. Adding these personal touches can turn a simple toy into your cat’s new favorite plaything.
Color Combinations
Choosing the right colors can make your kicker toy more visually appealing to both you and your cat. Cats see colors differently, with blues and greens standing out more to them than reds or pinks.
Try mixing bright and muted yarns to create patterns or stripes. You might use a soft blue with a neutral gray, or a vibrant green paired with cream. This not only looks nice but can catch your cat’s attention more effectively during play.
Adding Catnip
Adding catnip inside your kicker toy can make playtime irresistible. You can either sew a small pouch inside the toy or sprinkle dried catnip directly into the stuffing.
Be careful not to overdo it—too much catnip can overwhelm your cat or cause mess. A little goes a long way to keep your cat curious and engaged without making the toy too messy or smelly.
Varying Sizes
Size matters when it comes to kicker toys. Some cats prefer smaller toys they can bat around easily, while others like longer toys they can kick with both paws.
Think about your cat’s size and play habits. A kitten might enjoy a smaller, lighter toy, while a large adult cat may need something bigger and sturdier. You can experiment by making a few different sizes to see which your cat prefers most.

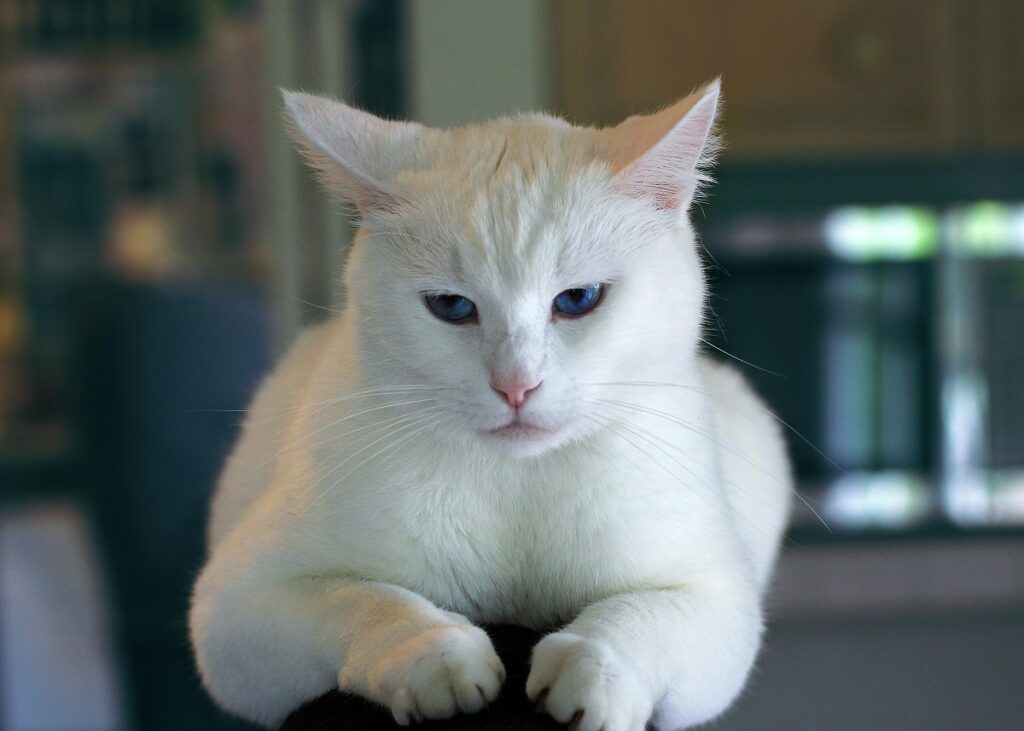
Credit: www.kittyglitz.com
Care And Maintenance
Keep the cat kicker toy clean by gently hand washing it with mild soap and cold water. Let it air dry completely to keep its shape and softness. Store it away from direct sunlight to prevent colors from fading.
Caring for your handmade crochet cat kicker toy is essential to ensure its longevity and keep your feline friend happy. Regular maintenance not only preserves its appearance but also ensures it remains a safe and enjoyable plaything. Let’s explore some practical ways to maintain your crochet cat kicker toy so it can withstand the test of time and those enthusiastic kitty paws.Cleaning Instructions
Keeping your cat kicker toy clean is crucial for both hygiene and durability. Begin by checking the yarn label for any specific washing instructions. Generally, gentle hand washing with mild soap works best to protect the delicate fibers. Fill a basin with lukewarm water and add a small amount of mild detergent. Submerge the toy and gently agitate it in the water. Rinse thoroughly to remove any soap residue, then gently squeeze out excess water without twisting. Lay the toy flat on a clean towel, roll it up to absorb more water, then reshape it and let it air dry completely. Avoid direct sunlight or heat sources, as they can damage the yarn.Repair Tips
Over time, your cat kicker toy may show signs of wear, but don’t worry—repairs can be simple. If you notice any loose threads, gently weave them back into the toy using a darning needle. For a hole or tear, patch it up with matching yarn. Carefully stitch it closed, making sure to secure the ends to prevent further unraveling. Consider adding a fun touch by sewing on extra embellishments like felt shapes or small bells. Not only does this cover repairs, but it also adds an element of surprise for your cat. Regularly check the toy for any signs of damage or loose stuffing. This proactive approach ensures your cat can continue to enjoy their beloved toy safely. Have you ever thought about the stories your cat’s toy could tell if it could speak? Maintaining your crochet creations keeps those tales unfolding, one playful pounce at a time.Frequently Asked Questions
What Materials Are Needed To Crochet A Cat Kicker Toy?
You need yarn, a crochet hook, fiberfill stuffing, scissors, and a yarn needle. Choose soft, durable yarn for safety.
How Long Does It Take To Crochet A Cat Kicker Toy?
Crocheting a cat kicker toy usually takes 1 to 3 hours. Time depends on your skill level and the toy’s complexity.
What Is The Best Yarn Type For Cat Kicker Toys?
Use soft, non-toxic, and durable yarn like cotton or acrylic. Avoid scratchy or irritating yarn for your cat’s comfort.
How Do You Safely Stuff A Crocheted Cat Kicker Toy?
Stuff the toy firmly but not too tight. Use hypoallergenic fiberfill to keep the toy soft and safe for cats.
Conclusion
Crocheting a cat kicker toy is fun and rewarding. You only need basic materials and simple steps. This handmade toy will keep your cat happy and active. Making it yourself saves money and adds a personal touch. Try different colors and shapes for variety.
Your cat will love the soft texture and playful design. Start crocheting today and enjoy quality time with your pet. Small efforts bring big smiles to both you and your cat. Keep practicing to improve your crochet skills easily.

Leave a Reply