
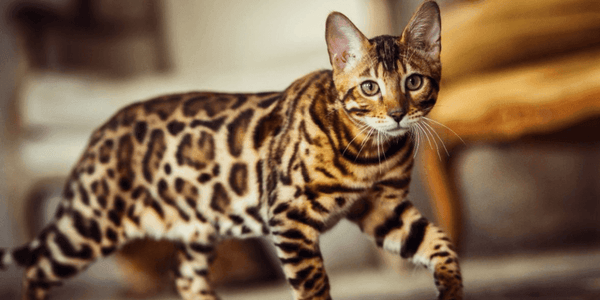
Looking for a fun and simple way to keep your cat entertained? You’re in the right place.
Making origami cat toys is a creative and affordable way to bring joy to your furry friend. With just a few folds, you can turn ordinary paper into playful shapes that your cat will love. Ready to discover how easy it is to make these toys yourself?
Keep reading, and you’ll have your cat purring with delight in no time.
Materials Needed
Gathering the right materials sets the foundation for making origami cat toys that both you and your feline friend will love. The materials you choose impact how easy the folding process is and how durable the toy will be during play. Let’s break down what you need to get started.
Choosing The Right Paper
Picking the right paper is crucial because it affects the toy’s sturdiness and safety. Opt for paper that is thick enough to hold folds well but not so stiff that it tears easily. Origami paper or lightweight cardstock works well.
Think about colors and patterns that will catch your cat’s eye. Bright colors or ones with interesting designs can keep your cat intrigued. Avoid glossy or coated paper as it may be slippery and hard to fold precisely.
Additional Supplies
Besides paper, having a few extra tools on hand makes the process smoother. A pair of sharp scissors helps you trim any uneven edges. You might also want some non-toxic glue or double-sided tape to secure folds that don’t stay put.
Consider adding small bells or feathers to the toys for extra fun. Just make sure any attachments are firmly fixed so your cat can’t swallow them. What simple extras could make your origami cat toys more engaging for your pet?
Basic Origami Folds
Mastering the basic origami folds is key to creating fun and durable cat toys. These folds form the foundation of most origami designs, making your crafting process smoother and more precise. Understanding how to execute them correctly can save you time and reduce frustration, especially if you’re new to origami.
Valley And Mountain Folds
The valley fold looks like a “V” when you fold the paper towards you, creating a dip or valley. The mountain fold is the opposite; the paper folds away from you, forming a ridge or mountain peak.
These two folds are the most common and appear in almost every origami project. When I first started, confusing these folds led to some awkward shapes, but once I practiced, the difference became clear and my models looked sharper.
Squash Fold
The squash fold is a clever way to flatten a flap of paper by opening it slightly and pressing it down. This fold can change the shape dramatically and add interesting details to your cat toys.
It might seem tricky at first, but once you get the hang of gently opening and pressing, it becomes a fun way to add dimension. Try it on a simple paper square and see how it transforms the shape.
Reverse Fold
The reverse fold involves folding a flap inside out along existing creases, either inward or outward. It’s great for creating ears, tails, or other small features on your cat toys.
I found that practicing reverse folds helped me add personality to my origami cats. It’s a small detail, but it makes the toy more lifelike and engaging for your feline friend.
Simple Origami Cat Toy Designs
Create fun origami cat toys using simple folds and basic paper shapes. These easy designs keep cats entertained with little effort. Follow clear steps to make safe, lightweight toys your cat will love.
Creating origami cat toys is a delightful way to engage your feline friend while tapping into your creative side. Simple origami designs ensure that even beginners can craft fun and interactive toys. These designs can be made with minimal supplies, usually just a sheet of paper, and a bit of patience. Let’s explore how you can make your own origami cat toys with these easy designs.Paper Mouse
Transform a simple square of paper into a playful mouse. This design is quick to make and will keep your cat entertained for hours. Start by folding the paper in half diagonally to form a triangle. Fold the top point of the triangle down to the base to create the mouse’s body. Then, create ears by folding the corners of the triangle upwards. Add a long tail with a strip of paper to complete the look. Watch your cat pounce and chase this fun creation.Fish Shape
A fish shape toy is another simple design that your cat will love. Begin with a rectangular piece of paper. Fold the paper in half lengthwise and then in half again to form a skinny rectangle. Next, fold one end into a triangle to form the fish’s head. Use scissors to cut slits at the opposite end to create a tail. This design offers a new texture for your cat to explore, enhancing their playtime experience.Crinkle Ball
For a crinkle ball, use a piece of aluminum foil or crinkly paper. Start by crumpling the material into a tight ball. This toy is perfect for cats who love the sound and sensation of crinkling materials. The reflective surface and noise will capture your cat’s attention, providing endless entertainment. You can also add a bit of catnip inside before sealing the ball for an extra treat. Simple origami cat toys are an easy and cost-effective way to enrich your cat’s playtime. Have you ever noticed how the simplest toys can bring the most joy to your furry friend? Give these designs a try and see which ones your cat prefers!
Credit: www.youtube.com
Adding Fun Elements
Adding fun elements to your origami cat toys makes them more attractive and engaging for your furry friend. These small touches can turn a simple folded paper into a captivating plaything that sparks your cat’s curiosity. Let’s look at some creative ways to add excitement to your origami creations.
Using Colors And Patterns
Choosing bright colors and interesting patterns can immediately catch your cat’s eye. Use colorful origami paper or decorate plain ones with non-toxic markers or stickers. Cats are drawn to contrast, so mixing bold stripes, dots, or even glow-in-the-dark paper can make your toy stand out.
Think about what colors your cat likes. Some cats prefer shiny or reflective surfaces, so adding a touch of metallic paper could work wonders. Have you noticed your cat’s reaction to certain colors or textures? Try experimenting with different combinations to see what excites them the most.
Attaching Bells And Feathers
Adding a small bell can create sound that keeps your cat interested in the toy longer. You can sew or glue a tiny bell securely inside or on the edge of the origami shape. Just make sure it’s firmly attached to avoid any choking hazards.
Feathers are another great addition. They mimic prey and invite your cat to pounce and play. Attach a few feathers to the tip of the origami toy using a small dab of hot glue or tape. The movement of feathers adds a natural, playful element that many cats find irresistible.
Have you tried combining both bells and feathers? The mix of sound and movement can turn a simple origami toy into a thrilling game piece. What fun elements will you add to make your cat’s playtime unforgettable?
Safety Tips For Cat Toys
Keeping your cat safe while playing with homemade toys is just as important as making the toys fun. You want your feline friend to enjoy their new origami cat toy without any risk to their health or safety. Paying attention to the materials you use and the design details can prevent accidents and keep playtime worry-free.
Choosing Non-toxic Materials
Not all paper or decorations are safe for cats. Use plain, uncoated paper or paper specifically labeled as non-toxic. Avoid glossy or colored paper that might contain harmful chemicals.
Think about what your cat might chew or lick. Some inks and dyes can irritate their mouth or cause stomach upset. I once tried shiny paper for a toy, and my cat immediately lost interest—probably sensing something off. Trusting simple, natural materials is usually best.
Avoiding Small Parts
Small bits like beads, googly eyes, or glued-on decorations might look cute but can be dangerous. Cats can swallow these and choke or block their intestines. Instead, opt for origami folds that create shapes without adding anything extra.
If you want to add texture or scent, try safe alternatives like catnip-filled paper pockets or securely folded layers. Ask yourself: could your cat pull off a piece and eat it? If yes, rethink the design to keep every part firmly attached and large enough to avoid swallowing hazards.

Credit: www.youtube.com
Tips For Playing With Your Cat
Playing with your cat is more than just fun; it’s a way to build trust and keep your furry friend happy and healthy. Using origami cat toys can add a unique twist to your playtime, sparking your cat’s curiosity with new shapes and textures. Here are some tips to make your play sessions with origami toys more engaging and beneficial.
Interactive Play Ideas
Try moving the origami cat toy like it’s alive. Drag it slowly across the floor or toss it gently to catch your cat’s attention. Cats love toys that mimic the movements of prey.
Use a string or ribbon to dangle the origami toy. This encourages your cat to jump and swipe, making playtime more exciting. Have you noticed how your cat reacts differently to toys that move unpredictably?
Rotate between different origami shapes to keep your cat interested. Changing the toy’s look can prevent boredom and stimulate your cat’s natural hunting instincts.
Encouraging Exercise
Origami toys are great for promoting physical activity without expensive gadgets. Toss the toy across the room to encourage running and chasing. Small bursts of play are perfect for your cat’s health.
Set up mini obstacle courses using origami toys and household items. This can motivate your cat to climb, jump, and explore. Have you tried turning playtime into a little adventure for your cat?
Make play a daily habit. Even five minutes a day can improve your cat’s fitness and mood. Regular exercise helps prevent obesity and keeps your cat sharp and alert.

Credit: www.youtube.com
Frequently Asked Questions
What Materials Are Needed For Origami Cat Toys?
You need colorful paper, scissors, non-toxic glue, and catnip. Choose lightweight paper for easy folding. Catnip adds attraction for your cat.
How Long Does It Take To Make Origami Cat Toys?
Making origami cat toys takes about 10 to 15 minutes. Beginners may take longer. Practice improves speed and folding precision.
Are Origami Cat Toys Safe For Cats?
Yes, they are safe if made with non-toxic materials. Avoid sharp edges and small parts. Supervise your cat during playtime for safety.
Can Origami Cat Toys Be Customized?
Absolutely! Use different paper colors and patterns. Add catnip or bells inside. Customize size to suit your cat’s preference.
Conclusion
Making origami cat toys is fun and simple. You only need paper and a little patience. These toys keep your cat busy and happy. They also save money and reduce waste. Try different shapes and colors to see what your cat likes.
Enjoy crafting and watching your cat play. Small steps can bring big joy to your pet’s day. Keep folding and have fun with your furry friend!

Leave a Reply