Looking for a fun and simple way to keep your cat entertained for hours? You’re in the right place.
Making a cat tunnel toy yourself is easier than you think, and your furry friend will love exploring, hiding, and playing inside it. Imagine the joy on your cat’s face as they dart through a cozy tunnel made just for them.
In this guide, you’ll discover step-by-step instructions that anyone can follow, no special skills needed. Ready to create a toy that brings endless fun and strengthens the bond between you and your cat? Let’s get started!
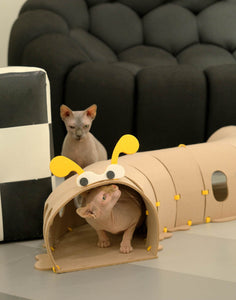
Credit: www.petplay.com
Materials Needed
Gathering the right materials is key to making a cat tunnel toy that your furry friend will love. The quality and safety of these materials can make a big difference in how long the tunnel lasts and how safe it is for your cat to play with. Let’s look at what you need to prepare before starting your project.
Choosing Safe Supplies
Safety comes first when picking materials for your cat tunnel. Avoid anything with sharp edges or toxic chemicals. Opt for soft, durable fabrics like fleece or cotton, which are gentle on your cat’s claws and skin.
Consider using non-toxic glue or stitching instead of staples or nails. Your cat will likely chew or scratch the tunnel, so materials that don’t break easily or release harmful particles are essential. Have you thought about adding washable fabrics to keep the tunnel clean?
- Soft, breathable fabric (cotton, fleece)
- Non-toxic glue or thread
- Flexible wire or plastic hoops for structure
- Cat-safe paint or markers (optional for decoration)
Tools For Assembly
Having the right tools makes the building process smoother and faster. You don’t need anything fancy—just basic household items will do. Scissors with a sharp edge help you cut fabric neatly without fraying.
A sewing needle and strong thread work well if you prefer stitching over glue. You might want a hot glue gun for quick fixes, but be cautious to avoid burns and keep glue away from your cat. A ruler or measuring tape ensures your tunnel is the perfect size for your cat to crawl through.
- Sharp scissors
- Sewing needle and strong thread
- Hot glue gun (optional)
- Measuring tape or ruler
Design Ideas
Designing a cat tunnel toy can be simple or creative. It depends on space, materials, and your cat’s play style. Choose a design that suits your home and your cat’s needs.
Some designs focus on ease and quick setup. Others offer complexity and extra fun. Each idea can keep your cat curious and active.
Simple Tube Tunnel
A simple tube tunnel uses one long tube or several connected tubes. Choose soft fabric or cardboard for comfort and safety. Keep the tunnel wide enough for your cat to move easily.
- Use flexible materials for easy folding and storage.
- Add soft padding inside for extra comfort.
- Secure ends to avoid collapse during play.
Multi-tunnel Maze
Create a maze by connecting multiple tunnels in different directions. This design encourages exploration and mental stimulation. Use connectors or tape to join tubes securely.
- Include straight, curved, and intersecting paths.
- Use different textures to make it interesting.
- Make openings large for easy entry and exit.
Interactive Features
Add features that engage your cat’s senses and instincts. Interactive elements keep playtime lively and fun. Use toys, holes, and hiding spots inside the tunnel.
- Attach dangling toys or feathers near openings.
- Cut small peek-a-boo holes for pawing and peeking.
- Incorporate crinkly materials for sound stimulation.
- Place treats or catnip inside for added excitement.
Step-by-step Assembly
Gather all materials before starting the assembly to keep the process smooth. Connect the tubes securely, ensuring no gaps for safety. Finish by adding soft fabric to make the tunnel cozy for your cat.
Creating a cat tunnel toy is not only a fun project but also a fantastic way to keep your feline friends entertained. Assembling the tunnel can be a rewarding experience that sparks creativity and provides endless joy for your cat. Let’s dive into the step-by-step assembly process to ensure your DIY cat tunnel is a success.Preparing The Tubes
First, gather your materials. You’ll need several cardboard tubes, like those from paper towel rolls or mailing tubes. Make sure each tube is clean and free of any adhesives or stickers. Trim the tubes to your desired length using scissors or a craft knife. This way, you can customize the tunnel’s length and shape to suit your space and your cat’s preferences.Connecting Sections
To connect the tubes, use duct tape or a hot glue gun. Align the tubes end-to-end and secure them together. For added stability, consider overlapping the ends slightly before taping or gluing them. This step ensures your tunnel remains sturdy during playtime.Adding Decorations
Now comes the fun part—decorating! Use non-toxic paint or markers to add color and patterns to the tubes. You can also wrap sections with fabric or paper for texture. Consider attaching small toys or feathers to the entrance for extra appeal. What will you do to make your tunnel unique and exciting for your cat? By following these steps, you’ll not only create a delightful toy but also enjoy a bonding activity with your pet. Share your creations and inspire others to join in the fun!
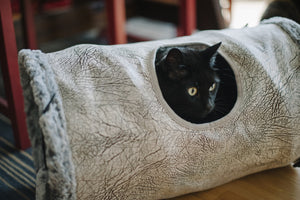
Credit: icocea.org
Safety Tips
Creating a cat tunnel toy is fun but safety must come first. Cats love to play and explore, so the tunnel should be safe for them. Small parts, sharp edges, or unstable designs can cause accidents. Follow these tips to make a secure and enjoyable tunnel for your cat.
Avoiding Hazards
- Check for loose threads or small parts that cats can swallow.
- Use non-toxic materials that are safe if chewed or licked.
- Cut edges smoothly to prevent scratches or cuts.
- Keep strings and ribbons away to avoid choking risks.
- Inspect the tunnel regularly for wear and tear.
Ensuring Stability
- Choose firm materials that hold shape during play.
- Secure connections with strong glue or stitches.
- Add a weighted base to prevent tipping over.
- Test the tunnel by gently pushing it to check balance.
- Place the tunnel on flat surfaces to avoid slipping.
Customizing The Tunnel
Customizing the cat tunnel makes it more exciting and inviting for your furry friend. It turns a simple plaything into a unique space that matches your cat’s personality and keeps them curious. Small changes can make a big difference in how often your cat returns to play.
Adding Toys And Treats
Incorporate small toys inside or around the tunnel to catch your cat’s attention. Hanging lightweight balls or feathers near the entrance encourages playful swats and pounces.
Try hiding treats in pockets or small pouches sewn onto the tunnel walls. This keeps your cat engaged as they search, adding mental stimulation alongside physical activity.
Have you noticed how your cat reacts differently when there’s a surprise inside their tunnel? This simple trick can keep them coming back for more playtime.
Personalizing With Colors
Use fabric paints or markers to add splashes of color that suit your home decor or your cat’s personality. Bright colors can stimulate your cat’s senses, while soft pastels create a cozy vibe.
Try patterns like paw prints or stripes to make the tunnel visually interesting. You can also let your cat “help” by gently pressing their paws in non-toxic paint for a paw-some personal touch.
What colors does your cat seem to respond to most? Observing their reaction can guide you in designing a tunnel they truly love.

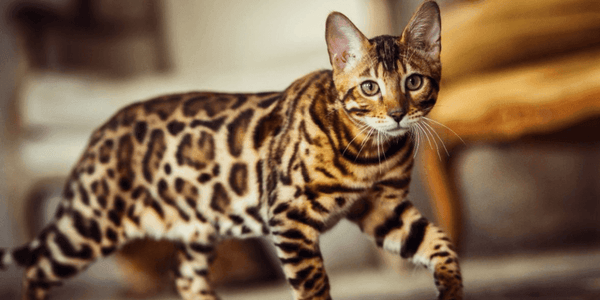
Credit: www.sheknows.com
Encouraging Play
Encouraging play keeps your cat active and happy. A cat tunnel toy is a perfect way to spark curiosity. It provides a safe space to hide, chase, and pounce. Cats love exploring new things, so introducing the tunnel right matters. Also, keeping your cat engaged will make the tunnel a favorite spot.
Introducing The Tunnel
Place the tunnel in a quiet, familiar area. Let your cat explore it at their own pace. Avoid forcing them inside the tunnel. Use treats or toys near the entrance to invite interest. Soft praise or gentle petting helps build positive feelings. Show how fun the tunnel can be by playing nearby. Watch their reaction and give space to explore.
Keeping Your Cat Engaged
Change toys inside the tunnel often. Use small balls, feather toys, or crinkle balls. Hide treats to encourage sniffing and movement. Play peek-a-boo by popping out from the tunnel ends. Rotate the tunnel’s location around the house. This keeps the environment fresh and interesting. Notice what excites your cat most and add it inside. Regular play sessions build a strong habit of fun.
Maintenance And Cleaning
Keeping your cat tunnel toy clean and well-maintained ensures your pet enjoys it longer. Dirt, fur, and wear can build up quickly. Proper care keeps the tunnel safe and inviting. It also helps prevent bad odors and damage.
Regular Upkeep
Check the tunnel for loose threads and dirt often. Use a handheld vacuum or lint roller to remove fur and debris. Spot clean stains with mild soap and warm water. Let the tunnel air dry completely before use. Avoid harsh chemicals that might irritate your cat’s skin. Store the tunnel in a dry place to stop mold and mildew.
Replacing Worn Parts
Look for tears or holes in the fabric regularly. Replace damaged parts like zippers or connectors to keep the tunnel stable. Use safe, non-toxic glue or sewing kits for repairs. If the fabric is too worn, consider buying new panels or making a new tunnel. Keeping parts in good shape prevents accidents and keeps your cat happy.
Frequently Asked Questions
What Materials Are Needed For A Cat Tunnel Toy?
You need cardboard tubes, non-toxic glue, scissors, and soft fabric. Optional items include catnip and small toys for added fun. These materials are safe and easy to find, ensuring a durable and engaging tunnel for your cat.
How Long Does It Take To Make A Cat Tunnel Toy?
Creating a cat tunnel toy usually takes about 30 to 60 minutes. The time depends on the complexity and decorations you add. It’s a quick DIY project that provides hours of entertainment for your pet.
Can I Use Recycled Materials For The Tunnel?
Yes, recycled cardboard boxes and tubes are perfect for making cat tunnels. They are eco-friendly and cost-effective. Just ensure the materials are clean and safe for your cat to explore and play inside.
How Do I Make The Tunnel Safe For Cats?
Use non-toxic glue and smooth edges to avoid injuries. Avoid small parts that cats can swallow. Adding soft fabric inside provides comfort and prevents scratches during playtime.
Conclusion
Making a cat tunnel toy is fun and simple. It keeps your cat happy and active. You only need a few materials and a little time. Your cat will love exploring and playing inside the tunnel. This DIY project saves money and creates a special toy.
Try making one today and watch your cat enjoy it. Small efforts bring big joy to your furry friend. Give it a go and see the fun unfold.

Leave a Reply